How To Add Velcro To A Patch Using The Easiest Methods & Best Glues
Discover the simplest solutions to add Velcro to a patch using high-quality adhesives. In this guide, we walk you through the step-by-step instructions to achieve a secure and durable bond. Whether you’re a beginner or a seasoned DIY enthusiast, these tips will make your patch projects simpler and more effective.

Key Takeaways
- To put Velcro on a patch, you will need your chosen patch, Velcro strips/squares, fabric glue, scissors, and a ruler.
- If you are not using fabric glue, you will need a peel-and-stick or iron-on Velcro patch, or you should use a sewing machine to apply the Velcro.
- ItÔÇÖs important to use high-quality adhesives and get durable Velcro strips for a lasting solution for your patches.
- We sell custom Velcro patches in many materials, enabling you to sidestep the process of applying the Velcro yourself for a simpler solution.
Table of contents
-
How To Add Velcro To A Patch
-
How Do You Attach Velcro To Fabric Without Sewing?
-
What Is The Best Glue To Stick Velcro To Fabric?
-
How To Attach Velcro To Fabric
-
How Do Velcro Patches Work?
-
How To Turn Iron-On Patches Into Hook And Loop Patches
-
How To Add Velcro To Headliner Patches
-
How To Add Velcro On Embroidery Patches Using An Iron
-
What Are The Different Types Of Velcro Patches?
-
How To Design And Prepare For Sewing Velcro Patches
How To Add Velcro To A Patch
Velcro patches are popular for their durability and flexible use, easily attaching to and removing from various surfaces. Adding Velcro to a patch is simple and can enhance the functionality of your patches, however you plan to use them.
Here’s what you’ll need to put Velcro on a patch:
- Your chosen patch
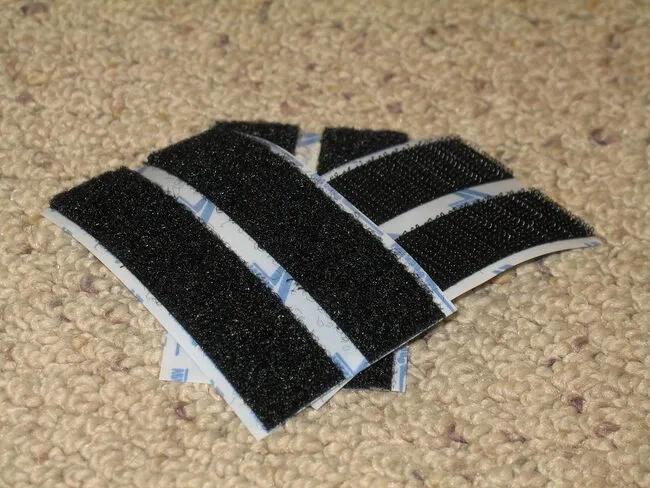
- Velcro strips or squares
- Fabric glue or another strong fabric adhesive
- Scissors
- Needle and thread (optional)
- Ruler or measuring tape
These essential supplies are all you need to do the job. Alternatively, you can order custom Velcro patches from us and they will arrive with their Velcro backing, ready to attach to your clothing, bags, hats, or other gear.

How Do I Put Velcro On A Patch Strep-By-Step?
To add Velcro to a patch is not a complicated process. Here is a step-by-step guide to secure attachment:
- Preparation: Clean the patch and fabric where it will attach, ensuring both surfaces are dry and dust-free.
- Measure and cut: Measure and cut the Velcro strips or squares to align with your patch size.
- Apply adhesive: Use a strong fabric glue and put it on the back of the Velcro hook side, then press it firmly onto the patch.
- Press and hold: Apply pressure as you hold the Velcro on the patch backing for several minutes as the adhesive sets.
- Attach to fabric: One dry, repeat the process with the loop side on the fabric (clothing, hat, bag, etc.)
- Finishing up: Consider sewing around the edges of the Velcro for extra security.
How Do You Attach Velcro To Fabric Without Sewing?
It’s easy to add Velcro to fabric without sewing if you use adhesive Velcro products and/or fabric glue. Here’s how you do it:
- Choose adhesive Velcro: You will find adhesive-backed Velcro strips or dots that are specifically designed for fabrics, making application easy.
- Clean fabric: The fabric surface must be clean and dry for optimal adhesion.
- Cut Velcro: Measure and cut your Velcro to the desired size.
- Apply fabric glue: Put some strong fabric glue on the back of the Velcro if it is a non-adhesive strip. For adhesive Velcro, simply peel off the backing.
- Press and hold: Firmly press the Velcro onto the fabric, holding it in place for several minutes.
- Allow to dry: Give the glue or adhesive 24 hours to set and form a strong bond.
Best Practices Attaching Velcro Without Sewing
It takes careful preparation and application to achieve a durable bond when adding Velcro to a patch. Here are some tips:
- Ensure the patch and fabric are clean and dry before adhesion.
- Choose high-quality, adhesive-backed Velcro designed for fabric.
- Always choose a strong, flexible fabric glue.
- Apply firm pressure when attaching to achieve a secure bond.
- Allow the adhesive to cure fully - this usually takes 24 hours.
- Reinforce edges by applying extra glue to the Velcro edges for added security.
With these tips, you can achieve a long-lasting attachment without sewing.
Try our custom Velcro patches for a simple solution
When you order custom Velcro patches from us, your patch will arrive pre-made and you can easily apply the Velcro parts without the need for sewing.
What Is The Best Glue To Stick Velcro To Fabric?
If you are seeking the best glue for sticking Velcro to fabric, your focus should be on fabric-specific adhesives that deliver a strong, flexible bond. Fabric glue is an excellent choice, and you should look for options that offer durability and washability, and that are known to dry quickly and deliver a strong hold. There are industrial-strength adhesives that are suitable for this job.
If you want a no-mess option, adhesive-backed Velcro strips eliminate the need for liquid glue. Always follow the manufacturer’s instructions closely for best results. If you want an even simpler solution, create your own custom Velcro name patches with our service to get personalized patches with a ready-to-use Velcro backing straight out of the box.
Tips When Using Glue To Attach Velcro
When using glue to attach Velcro to fabric, the following tips will help you achieve the best results:
- Ensure the fabric is clean and dry to enable optimal adhesion.
- Use a fabric-specific adhesive for a strong, flexible bond.
- Spread the glue evenly to avoid lumps on the Velcro strip.
- After applying the glue, press the Velcro firmly onto the fabric for several minutes to promote good adhesion.
- Allow the glue to cure fully before using the fabric - this usually takes 24-48 hours.
- Avoid excess glue, as too much glue can seep through the fabric and leave a messy finish.
Keep these tips in mind to experience good results with your gluing.
How To Attach Velcro To Fabric
Velcro is a great option for how to put a patch on a hat or other garment, and there are various methods to attach Velcro to your patch.
- Sewing: This offers great security, and you must stitch around the Velcro edges to hold it in place.
- Adhesive: This includes fabric glue or adhesive-backed fabric strips for a no-sew approach.
Both of these methods can be highly effective, so the choice really comes down to your preferences. Many prefer to avoid sewing as they are not confident in their skills, but others enjoy the strength and tidy appearance of sewing.
Whichever method you choose, test the attachment by gently tugging at the Velcro strip. It should stay in place without peeling. You could combine adhesive and sewing for maximum strength.

Want a simple solution to add a patch to your backpack?
Our custom Velcro patches for backpacks are designed for maximum convenience and flexibility. Design yours with flair and enjoy a simple attachment process for any backpack.
Learn moreHow Do Velcro Patches Work?
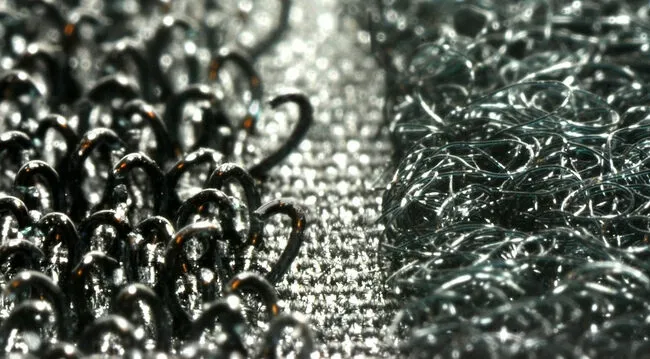
Velcro patches work via the hooks and loops that grip together when pressed and pull apart when separated. The hook side is made up of tiny, stiff hooks, while the loop side has much softer loops. When you press the two together, their components interlock to create a strong bond.
Velcro patches can be used in a range of applications, such as motorcycle vest patch placement, labeling bags, or customizing hats. They are a versatile choice as they can be easily attached and removed, enabling you to swap out or reposition patches without having to modify any permanent attachment methods. This makes them a popular choice for:
- Military uniforms
- Sports apparel
- Travel bags
How To Turn Iron-On Patches Into Hook And Loop Patches
To add Velcro to an iron-on patch, thus changing the patch type, you will need an iron-on patch, some Velcro strips, fabric glue or adhesive Velcro, and scissors.
We don’t recommend using the heat-activated adhesive to bond to the Velcro strips, so here’s how to do it:
- Prepare the patch: Ensure it is clean and dry.
- Cut the Velcro: Make sure the Velcro strips match the size of the patch.
- Attach the hook side: Apply fabric glue to the hook side of the Velcro strip, then press it firmly onto the back of the patch.
- Cure: Let the glue dry completely, following the manufacturer’s instructions.
- Apply the loop side: Attach the loop side of the Velcro to the desired fabric surface.
- Secure the attachment: Make sure you press the patch firmly onto the loop side for a strong bond.
Apply removable patches to your tactical vest with no sewing
We supply high-quality custom Velcro patches for tactical vests that enable interchangeable patches with a quick application to keep hassle to a minimum.
How To Add Velcro To Headliner Patches
You can put Velcro on patches to create headliner patches for your car. You will need your desired patch, some Velcro strips, fabric glue, scissors, and a marker.
Here’s how it’s done:
- Make sure the patch is clean and dry.
- Cut the Velcro strips to match the patch size.
- Apply fabric glue on the hook side of the Velcro.
- Press the glued Velcro strip firmly onto the back of the patch and allow it to dry completely.
- (Optional) Apply the loop side of the Velcro to the desired location on the headliner (the hook side of the Velcro may attach directly to the headliner)
- Press the patch onto the desired position and test for a secure hold. Adjust if necessary.
How To Add Velcro On Embroidery Patches Using An Iron
If you order a custom embroidered patch from us, you can attach Velcro to the back of the patch to convert it into a Velcro patch. You will need an embroidered patch, iron-on Velcro strips, scissors, and an iron.
- Ensure the patch is clean and dry.
- Cut the Velcro strips to match the patch size.
- Place the hook side of the Velcro on the patch rear.
- Set your iron to medium heat and deactivate the steam. Place a cloth over the Velcro and press the hot iron against it firmly for 15-30 seconds.
- Allow the Velcro to cool and ensure it is securely attached.
Tips For Best Results
Iron-on patches stay on for the long haul when applied correctly, and the same is true for iron-on Velcro strips. But correct application is crucial when you put Velcro on patches, so here are some tips:
- Preheat the iron before application for the optimal temperature.
- Press firmly during application to ensure a strong bond.
- Protect the patch and the Velcro with a pressing cloth or parchment paper.
- Check the alignment carefully before ironing for best results.
- Reapply the heat if you don’t get a strong adherence initially.
- Let the patch cool completely before you try to use it.
These are all common best practices for iron-on applications, so follow these tips carefully and you should get a strong, durable outcome.
Want a simple way to add a name to your apparel?
Whether for hats, jackets, or bags, our custom Velcro name patches offer a no-fuss solution to add a removable patch that ensures your items are clearly labeled.
Get startedWhat Are The Different Types Of Velcro Patches?
Velcro patches consist of a hook and a loop section, and it’s important to understand the differences between these two key components.
- Hook: This side features small, stiff hooks.
- Loop: This has soft, pliable hoops.
Iron-on Velcro patches are made using Velcro strips with an adhesive backing activated by heat. They offer a fairly strong bond and are easy to apply on fabrics that can withstand heat. Adhesive Velcro patches, meanwhile, are made using peel-and-stick Velcro strips or fabric glue. They are versatile, offer an even stronger bond, and can be used even on materials that can’t withstand heat.
Each type will be well-suited to different preferences and applications, so explore your options.
How To Design And Prepare For Sewing Velcro Patches
It takes planning if you want to use sewing to add Velcro to a patch. You will want to start with the right patch type - fabric patches with a sturdy backing work well for this. Choose high-quality Velcro with a strong hook and loop for a durable outcome.
When preparing, consider the size and shape of the patch and how that aligns with the Velcro pieces. We recommend choosing a thread that matches the patch and Velcro colors for a seamless appearance.
Before you sew, mark the exact position where the Velcro will be applied. You could use pins or fabric glue to hold it in place temporarily. A strong needle will be needed to penetrate the thick material, and you should reinforce the edges with double stitching the ensure the Velcro remains securely attached. Needlework is great to make custom embroidered patches, but be aware that attaching Velcro this way will leave visible stitching on the front of the patch as well.

Preparation Steps
There are several steps involved in preparing a sewing machine to put Velcro on a patch. First, you will need a heavy-duty needle that works for thick materials and thread that matches the Velcro. Adjust the machine’s tension settings to accommodate thicker layers. And use a walking foot to ensure even feeding of the fabric and Velcro.
Before you sew, trim the edges of the Velcro strips to ensure a clean finish. And pin or baste the strips in place so that they don’t shift during sewing. For a simpler solution, order custom Velcro patches from us and you won’t need to worry about applying Velcro strips to your patch manually.
Frequently Asked Questions About How To Add Velcro To A Patch
How Do You Attach Velcro To A Patch?
You could use adhesive-backed Velcro strips or apply fabric glue. You may also find heat-activated Velcro strips for an iron-on application, or you could sew the Velcro into position.
How Do You Attach Velcro To Fabric Without Sewing?
Fabric glue is the most common solution for this. You may also find peel-and-stick adhesive strips, or iron-on ones, but the simplest approach is to use fabric glue or order custom Velcro patches.