How To Sew On Civil Air Patrol Patches: Placement, Stitch Types, And Best Tools
Sewing Civil Air Patrol (CAP) patches correctly is important for maintaining a professional appearance and meeting uniform regulations. The process of sewing on CAP patches depends on the uniform type, patch material, and preferred sewing method.
In this guide, we provide a step-by-step breakdown of how to sew on Civil Air Patrol patches, including the best tools and techniques. Whether you are using a sewing machine or hand-stitching, read on to learn all you need to know.

Key Takeaways
- Sewing techniques vary depending on the patch type and uniform material, and you will need the correct tools for maximum durability.
- Proper CAP patch placement is mandatory for uniform compliance.
- Hand-sewing and machine-sewing methods both have advantages, and reinforcement techniques help prevent patches from loosening over time.
- We supply high-quality custom patches that can be created for use in official and unofficial Civic Air Patrol designations.
Table of contents
-
How To Sew On Civil Air Patrol Patches?
-
Where To Put Civil Air Patrol Patches On Uniforms?
-
How To Attach Tab, Badge, Patch, And Rank On USAF And CAP BDU Pattern?
-
What Are The Civil Air Patrol Insignia Rules?
-
How To Sew Civil Air Patrol Patches Without A Sewing Machine
-
How To Fix Loose Or Falling-Off Civil Air Patrol Patches
-
Easiest Way To Sew Civil Air Patrol Cadet Officer Patches?
-
How To Sew On A Grade Patch Correctly?
-
How To Sew On Civil Air Patrol Patches Without Visible Stitches
-
What Should You Put On Sew-On Civil Air Patrol Patches For Extra Durability?
-
How To Sew Civil Air Patrol Patches Onto Caps Properly?
How To Sew On Civil Air Patrol Patches?
Proper patch placement is a key consideration to ensure compliance with CAP uniform guidelines. Misplaced patches can lead to a non-uniform appearance that may require correction. Before sewing your CAP patches, you will need your patches, a matching thread, a hand-sewing needle or sewing machine, fabric pins, fabric scissors, and a thimble.
Here’s the method:
- Mark placement: Use a fabric marker to outline the exact location of the patch in line with CAP regulations.
- Pin the patch in place: Secure with fabric pins to prevent shifting while sewing.
- Thread the needle: Use a strong, color-matched thread.
- Start stitching: Sew with a backstitch or whipstitch for hand-sewing or a zigzag or straight stitch with a machine.
- Reinforce the edges: Go over each edge twice to strengthen the attachment and prevent fraying.
- Trim: Cut away any loose threads.
This method will work for custom tactical vest patches and any other patch types you might need on your uniform.

Where To Put Civil Air Patrol Patches On Uniforms?
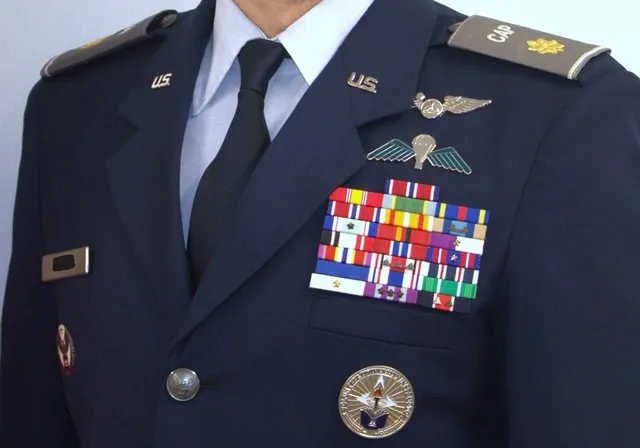
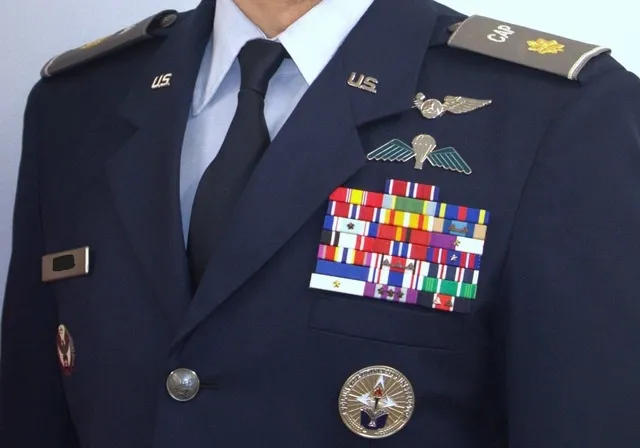
Just like with military OCP patch placement, Civil Air Patrol uniforms follow specific placement regulations, and incorrect placement is a uniform infraction.
- Right sleeve: The U.S. flag patch goes on the right shoulder.
- Left sleeve: This is where the unit or wing patch goes.
- Chest area: Name tape and rank insignia go above the left and right breast pockets.
Common mistakes include poor alignment, uneven stitching, and using the wrong patch size.
Looking for patches that can be easily attached and removed?
Work with us to create custom Velcro patches for official Civil Air Patrol use in uniforms or to sell as merchandise to raise awareness of your activities.
How To Attach Tab, Badge, Patch, And Rank On USAF And CAP BDU Pattern?
The USAF and CAP Battle Dress Uniform (BDU) patterns are slightly different when it comes to patch placement, but accurate positioning is essential for both. Let’s take a look at the specifics:
- Tabs and badges: Tabs like the National Cadet Competition Tab should go directly above the name tape.
- Unit and wing patches: Place these on the left sleeve.
- Rank insignia: This must be centered on the chest above the right pocket.
Let’s look at the basic steps for attaching these things:
- Measure placement with a ruler based on CAP guidelines.
- Secure with pins or adhesive spray.
- Sew using a backstitch or machine zigzag for a durable attachment.
Proper positioning and alignment are essential, so take your time to get these things right.
What Are The Civil Air Patrol Insignia Rules?
Civil Air Patrol insignia represent rank, achievements, and qualifications, so proper placement is essential. The guidelines for CAP are CAPM 39-1, ensuring a standardized and professional look. CAP flew over 95,000 hours in 2022, so its importance to the nation is beyond question.
Insignia placement varies depending on uniform type, but there are several common placements between uniforms:
- Rank insignia: These are centered above the right breast pocket.
- Skill badges: Positioned above the left pocket.
- Command patches: These belong on the left sleeve.
- Specialty insignia: Place these on the right.
To maintain uniform integrity, patches must be sewn securely, even aligned, and fully compliant with CAP regulations. We recommend that you check CAP uniform manuals to ensure proper adherence to official insignia placement rules.
Create patches with clear, vibrant embroidery and superb durability
With our online service, you can create custom embroidered patches for official Civilian Air Patrol or merchandise use and enjoy high-quality craftsmanship and competitive pricing.
Learn moreHow To Sew Civil Air Patrol Patches Without A Sewing Machine
Hand-sewing is a reliable alternative when a sewing machine isn’t available. The best methods to securely attach patches are:
- Backstitch
- Running stitch
- Whipstitch
You should use a strong polyester thread to prevent fraying and detachment over time. Position the patch carefully, pin it in place, then begin sewing with small, even stitches for a professional finish. A thimble will help avoid discomfort when stitching.
If you want to avoid sewing, work with us to create custom rectangle patches with Velcro or iron-on backings for a hassle-free way to attach CAP patches without any sewing skill.
How To Make Hand-Sewn Patches Last Longer
You can improve the durability of hand-sewn Civil Air Patrol patches by reinforcing the stitches and protecting the fabric from wear. A double-stitched border strengthens the patch attachment and prevents loose edges. And we recommend polyester or nylon thread for their strength and durability.
Apply fabric glue along the edges for a little extra reinforcement to ensure the patch stays securely in space. If you need additional protection, sew interfacing fabric onto the back of the uniform to help stabilize the patch area.
Check regularly for loose threads and reinforce weak spots to ensure that patches remain intact. With proper patch care, such as gently washing and avoiding excessive heat, you can preserve the patch’s vibrant appearance and boost its overall longevity.

How To Fix Loose Or Falling-Off Civil Air Patrol Patches
The most common causes of loose patches include frayed stitching, fabric wear, or poorly-executed sewing techniques. The first step to fix them is to identify the weak spots and determine whether the patch needs partial or complete restitching.
If only a section has come loose, reinforce the stitching with a robust backstitch or whipstitch. If the entire patch is falling away, the best course of action is to carefully remove it with a seam ripper, reposition it properly, and sew it again with better technique.
You could explore the best fabric glue or iron-on adhesive to help reinforce the patch adhesion as well. Check your patches regularly to prevent further detachment. This way, your CAP uniform will maintain a clean and professional appearance at all times.
Best Way To Restitch A Patch Without Damaging The Uniform
Restitching a Civil Air Patrol patch takes precision to avoid damaging the uniform fabric. Research has shown that uniforms are standardized, distinct forms of dress that contribute to togetherness and orderliness, so it is important to keep them in good condition.
Here’s how to restitch a patch carefully:
- Use a seam ripper to carefully remove loose or uneven stitches.
- Once removed, realign the patch according to CAP uniform guidelines.
- Secure using pins or fabric tape.
- Use a fine needle and strong thread to create small, even stitches around the patch edges.
Try not to pull the thread too tightly as this can cause puckering. The best stitch choices are backstitch or ladder stitch for a clean, durable attachment that helps maintain uniform integrity.
Do you need personalized patches relating to the Civil Air Patrol?
With our custom flight patches, you can get aviation-related clothing patches with vibrant, eye-catching designs relating to the Civil Air Patrol
Easiest Way To Sew Civil Air Patrol Cadet Officer Patches?
Sewing Civil Air Patrol Cadet Officer patches requires proper tools and technique to achieve a neat and professional finish. You can make the process simpler by using a sewing machine with a zigzag or straight stitch for efficiency.
If you are hand-sewing, you can provide durability while keeping visible thread to a minimum with a backstitch or ladder stitch. Fabric pins or temporary adhesive are helpful to keep the patch in place as you sew patches on by hand.
Another thing that can be beneficial is to use a curved needle, which allows for easier stitching when working on thicker fabric. Reinforce your patch with an extra row of stitches along the edges to minimize the risk of lifting or fraying.
How To Sew On A Grade Patch Correctly?
Grade patches indicate rank and must be positioned precisely on the uniform. To sew one correctly, your first step is to refer to CAP regulations for the appropriate placement. We recommend using a ruler, and tailor’s chalk is ideal to mark the correct location before you secure the patch in place with pins.
When sewing, use a backstitch or whipstitch to achieve a strong attachment with minimal visible stitches. A matching thread color helps blend the stitches into the uniform, and you can reinforce the edges with an extra row of stitching to prevent peeling or fraying.
Proper alignment and secure stitching help achieve a regulation-compliant appearance. If you are a civilian attaching these patches to a custom hoodie or other garment, you have more freedom with placement.
Create legible, durable text patches to display messaging and other information
With our custom text patches, you will enjoy high-quality fonts and precision craftsmanship to ensure patches that serve their purpose and stand the test of time.
Get startedHow To Sew On Civil Air Patrol Patches Without Visible Stitches
For an invisible stitch, we recommend the ladder stitch technique. To achieve this, take small, alternating stitches inside the patch border. This hides the thread beneath the fabric.
Another option is invisible hemming for a seamless look. If you need additional reinforcement, iron-on backing can be used along with minimal stitching. Opt for a fine needle and matching thread to blend the stitches into the uniform fabric.
If you are sewing by hand, keep stitches tight and evenly spaced for a clean finish. This is particularly important if you are sewing onto baseball hats as uneven stitching will really show up. A sewing machine with a fine stitch setting is also good for a discreet result.
Best Thread Colors For Matching Patch Edges
The correct thread color ensures your patches blend naturally into the uniform. For a dark-colored uniform, black or navy blue thread is the best solution. White thread works well for light-colored uniforms.
If you are stitching patches with multiple colors, select a thread that matches the outermost border for a seamless look. Some patches have contrasting edges, so a neutral shade like gray or tan will offer a balanced finish.
Test a few stitches on scrap fabric to ensure the best color match. With the right thread color, you can enhance your uniform appearance and professionalism.
What Should You Put On Sew-On Civil Air Patrol Patches For Extra Durability?
You can increase the durability of sewn-on Civil Air Patrol patches by using reinforcement materials. From fabric glue to stronger thread types, let’s look at some options:
- Fabric glue: Learn how to glue patches to fabric to add extra adhesion. Fusible interfacing can help as well.
- Double stitching: Do this around the edges to secure the patch more effectively.
- Heat sealing: Do this round the edges with a fabric sealer to prevent fraying.
- Polyester/nylon thread: These materials resist wear better than cotton thread.
Avoid excessive washing or high-heat drying as these can weaken stitches over time. With proper reinforcement, your patches will remain secure and look professional at all times.
How To Sew Civil Air Patrol Patches Onto Caps Properly?
Sewing Civil Air Patrol patches onto caps takes special attention as the surface is naturally curved. The first step is to position the patch precisely and secure it with pins for stitching. From here, do the following:
- Hand sewing: Use a curved needle for better control and a backstitch or ladder stitch for maximum strength.
- Sewing machine: Adjust the presser foot to accommodate the cap’s shape.
It is wise to reinforce the edges with extra stitching to maximize durability. If the patch is difficult to sew, a Velcro backing or fabric glue are good alternatives to achieve a secure attachment. Custom hat patches are optimized for applying to hats and can enhance uniform presentation and longevity.

Frequently Asked Questions About How To Sew On Civil Air Patrol Patches
How To Sew On Civil Air Patrol Patches Correctly?
Follow CAP regulations for precise placement and use reinforced stitches to keep your patches securely attached for the long term.
What Is The Best Stitch To Sew On A Patch?
A backstitch or ladder stitch are the ideal hand-sewing techniques for durability and minimal visibility. For machine-sewn patches, a zigzag stitch works well.